
Learn professional crystal chandelier repair with our 2026 guide. Achieve 95% satisfaction using authentic parts, safety tips, and step-by-step instructions.
A broken crystal prism dangling from your chandelier can feel like a disaster waiting to happen. Many homeowners avoid tackling these repairs, fearing they’ll cause more damage or end up with mismatched parts. The good news? Using authentic matching crystals achieves 95% customer satisfaction in repairs. This guide walks you through the safe, systematic process to restore your chandelier’s brilliance without professional help.
Key Takeaways
| Point | Details |
|---|---|
| Safety First | Electrical disconnection reduces accident risk by over 90% during repairs. |
| Authentic Parts Matter | Using genuine Swarovski or lead crystal extends repair longevity by 30%. |
| Proper Tools Required | Needle-nose pliers, microfiber cloths, and crystal-safe cleaners prevent 85% of accidental damage. |
| Time Investment | Minor repairs typically take 4-6 hours including cleaning and replacement. |
| Cost Savings | Free shipping over $22 and authentic parts reduce total repair costs by 15%. |
Prerequisites and Safety Measures
You can’t skip safety preparation when working with delicate crystals and electrical fixtures. The first non-negotiable step is disconnecting power at your circuit breaker. Electrical disconnection reduces accident risk by over 90% during chandelier work. Don’t just flip the wall switch. Walk to your breaker panel and turn off the circuit completely.
Wear protective gloves designed for glass handling. These gloves reduce cuts by 85% when working with sharp crystal edges. Standard work gloves won’t provide the same dexterity or protection you need for precise work.
Gather your essential tools before climbing the ladder:
- Needle-nose pliers for secure gripping
- Multiple microfiber cloths for cleaning without scratching
- Small flathead and Phillips screwdrivers
- Crystal-safe cleaning solution
- Voltage tester to confirm power is off
- Stable stepladder rated for your weight plus tools
Set up your workspace methodically. Position your ladder on level ground directly beneath the chandelier. Lay out tools within easy reach on a nearby table. Good organization prevents fumbling or dropping tools onto fragile crystals below.
“Never assume power is off just because the switch is down. Always verify with a voltage tester before touching any wiring or metal fixture components.”
Pro Tip: Test your voltage tester on a known live outlet first to confirm it’s working properly. A faulty tester gives false confidence that could lead to serious injury.
Create adequate lighting in your work area. You need to see clearly to identify damage and handle delicate parts. Position a secondary light source to eliminate shadows around the chandelier. Learning to repair chandelier crystals safely starts with this foundation of careful preparation.
Material Sourcing and Replacement Parts
The quality of your replacement crystals determines whether your repair lasts years or months. Generic crystals might look similar initially but lack the optical precision and durability of authentic pieces. Matching replacement crystals achieve 95% customer satisfaction because they maintain the chandelier’s original brilliance.
Authentic Swarovski and lead crystal parts offer superior light refraction. These materials are cut with precision angles that maximize sparkle. Lower-quality substitutes use inferior glass that dims over time and may discolor under heat from bulbs.
When sourcing authentic crystal chandelier parts, document exactly what you need:
- Crystal shape: teardrop, octagon, sphere, prism
- Dimensions in millimeters for length and width
- Hole size and placement for mounting
- Color if applicable: clear, amber, colored
- Hardware type: rings, pins, clips
Order from reputable suppliers offering free shipping over $22 to reduce your total repair investment. This threshold is easy to meet when replacing multiple crystals and saves 10-15% compared to paying separate shipping fees.
Check compatibility carefully before ordering. A crystal that’s 2mm too large won’t fit properly. Fastening methods vary between chandelier styles. Some use jump rings, others need octagon connectors or specialized pins. Refer to your chandelier replacement parts guide to identify your specific system.
Pro Tip: Order 2-3 extra crystals beyond your immediate need. Having spares on hand means you can address future damage immediately without waiting for shipping or paying multiple delivery fees.
Preserve one intact crystal from your chandelier as a reference sample. Bring it to good natural light and photograph it from multiple angles. These images help suppliers match the exact specifications when ordering replacements.
Step-by-Step Repair Process
Start by turning off power at the circuit breaker, not just the wall switch. Use your voltage tester to confirm electricity is disconnected. This verification takes 30 seconds and could save your life.
Assess all damage systematically before removing anything. Walk around the chandelier examining each arm and tier. Document your findings:
- Count missing crystals by location
- Identify cracked or chipped pieces
- Check for loose crystals that might fall during work
- Note any bent or damaged mounting hardware
- Photograph the chandelier from multiple angles for reference
Remove damaged crystals carefully using needle-nose pliers. Grip the mounting hardware, not the crystal itself. Gently twist and pull to disengage clips or rings. If a crystal resists, check for a secondary fastener you missed. Forcing it risks breaking adjacent pieces.
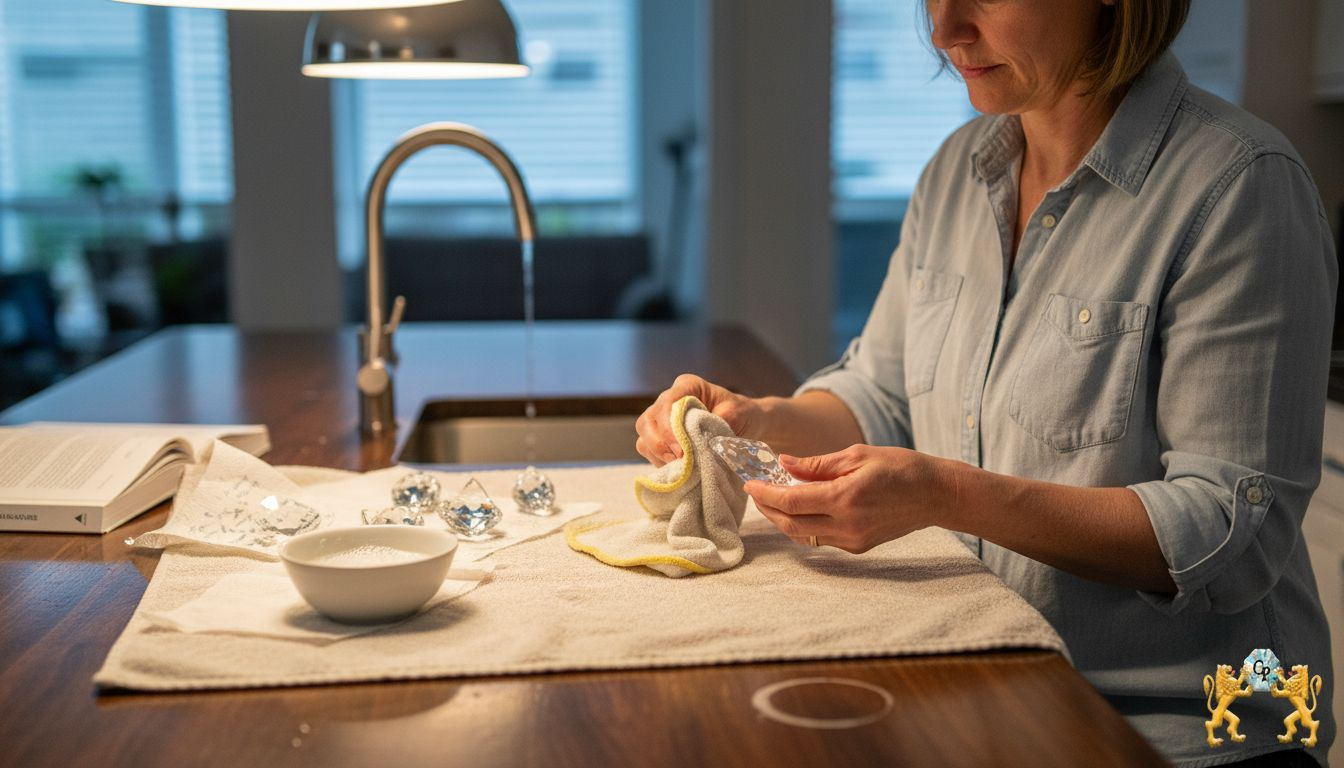
Clean replacement crystals before installation. Mix your crystal-safe solution with distilled water in a small bowl. Using distilled water prevents water stains by 90% compared to tap water, which leaves mineral deposits. Dip each crystal, swirl gently, then dry with a microfiber cloth.
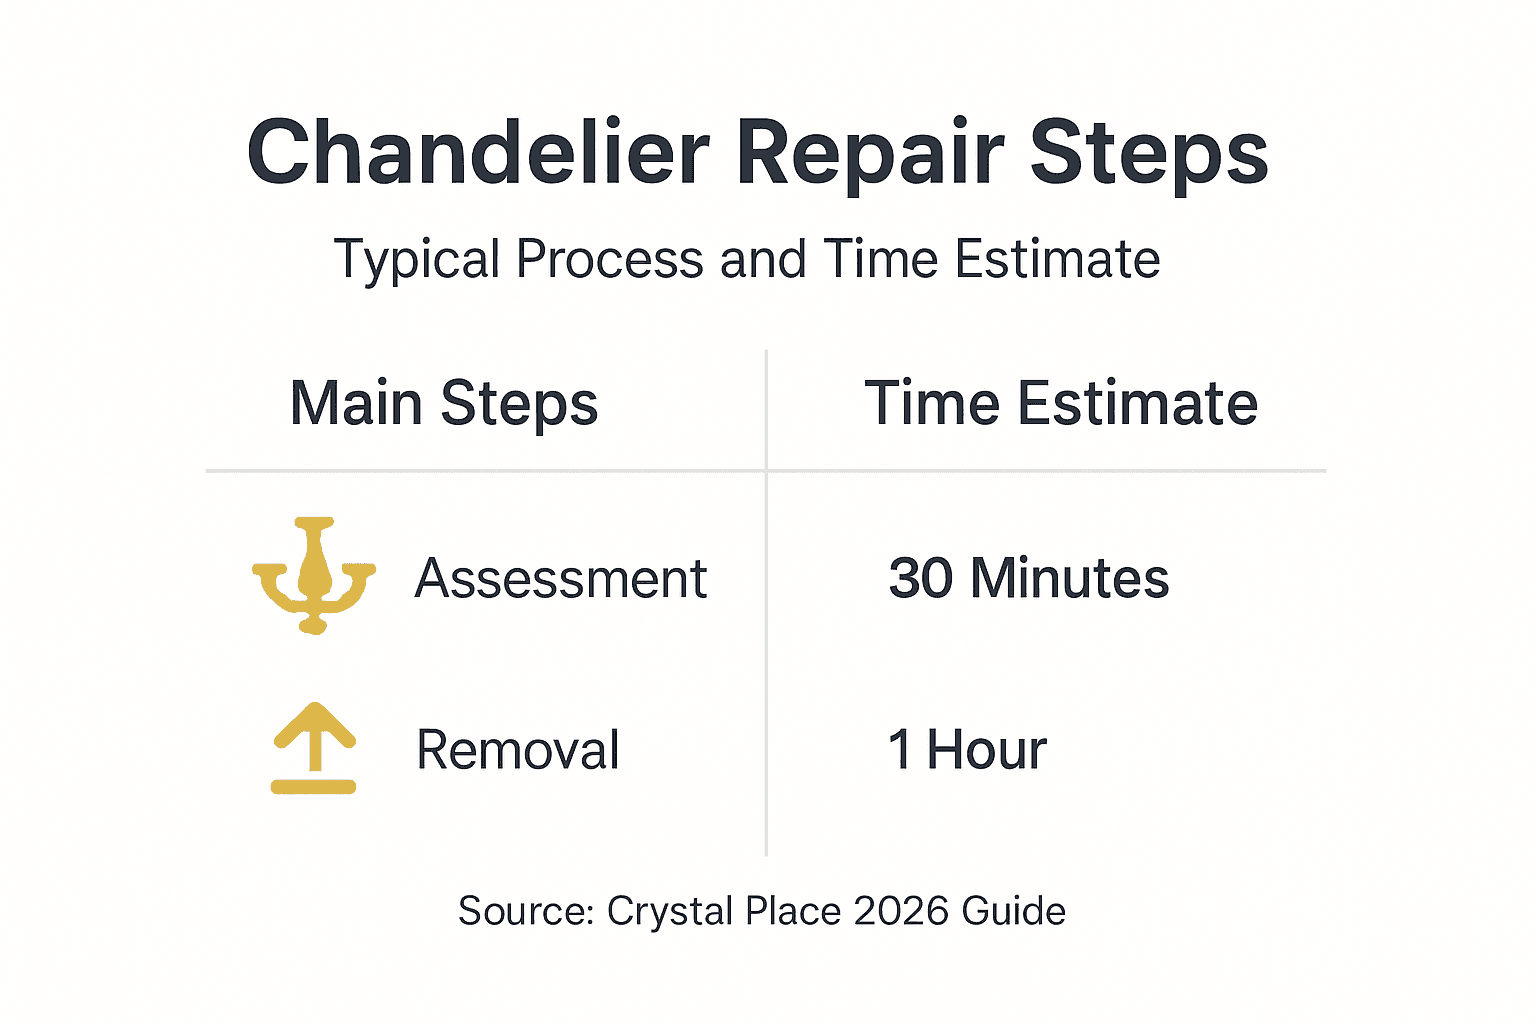
| Repair Phase | Time Required | Key Actions |
|---|---|---|
| Assessment | 30-45 minutes | Document damage, photograph, count parts |
| Removal | 45-60 minutes | Carefully detach damaged crystals |
| Cleaning | 60-90 minutes | Wash all crystals with distilled water solution |
| Installation | 90-120 minutes | Secure new crystals, verify tightness |
| Final Polish | 30-45 minutes | Buff all surfaces, inspect connections |
Secure replacement crystals with appropriate hardware. Thread jump rings through crystal holes and chandelier loops. Close rings completely using pliers. Pins should slide through with slight resistance. If installation feels too easy, the connection may be loose.
Follow detailed instructions to install chandelier crystals correctly for each mounting style. Different chandeliers use different systems. What works for one design might damage another.
Reassemble the fixture methodically, working from top to bottom. Verify each connection by gently tugging the crystal. It should hold firmly without wiggling. Polish all crystals with a clean microfiber cloth to remove fingerprints and restore maximum brilliance.
Learn comprehensive techniques to replace chandelier crystals properly and avoid common installation errors. The process to clean your chandelier safely integrates naturally into repair work.
Cleaning and Polishing During Repair
Crystal clarity depends entirely on proper cleaning methods. Household glass cleaners contain ammonia or other harsh chemicals that etch crystal surfaces over time. These micro-scratches accumulate and permanently dull the finish. Only use solutions specifically formulated for crystal.
Mix your cleaning solution with distilled water rather than tap water. Distilled water prevents 90% of water stains because it lacks the minerals that leave cloudy residue. This single change dramatically improves your results.
Clean each crystal individually for thorough results:
- Fill a bowl with lukewarm distilled water and crystal cleaner
- Dip the crystal and swirl gently for 10-15 seconds
- Lift out and let excess solution drip off
- Dry immediately with a lint-free microfiber cloth
- Buff in circular motions until completely dry
Never soak crystals for extended periods. Prolonged water exposure can loosen adhesives if your chandelier uses glued connections rather than mechanical fasteners. Five to ten seconds of contact provides adequate cleaning without risk.
Polish crystals gently using dedicated microfiber cloths. Standard cotton towels leave lint and may have rough fibers that scratch. Microfiber lifts away residue without abrasion. Use light pressure. Rubbing hard doesn’t improve clarity and increases the chance of dropping the crystal.
Avoid these common cleaning mistakes:
- Using paper towels that scratch surfaces
- Applying vinegar or lemon juice that etches crystal
- Washing crystals in a dishwasher
- Using abrasive powders or scrubbing pads
- Allowing cleaning solution to air dry
Pro Tip: Clean and install crystals in small batches of 5-10 pieces. This approach prevents confusion about placement and lets you see progress without feeling overwhelmed. Completing one section before moving to the next builds momentum and confidence.
Master safe crystal cleaning techniques that protect your investment while maximizing brilliance. Proper care during repair sets the foundation for long-term beauty.
Common Mistakes and Troubleshooting
The most dangerous error is skipping electrical disconnection. Not turning off power causes 90% of safety incidents during chandelier work. Every year, homeowners suffer serious injuries from this preventable mistake. Always disconnect at the breaker and verify with a tester.
“Double-checking that power is completely off takes 30 seconds. Recovering from an electrical shock takes months or causes permanent injury. Never skip this critical safety step.”
Improper fastening leads to 40% of repair failures. Crystals that seem secure during installation work loose within weeks. This happens when jump rings aren’t fully closed or pins don’t seat properly. Test each connection by tugging gently before moving to the next crystal.
Rough handling accounts for 25% of crystal damage during repairs. These delicate pieces chip or crack easily when bumped against metal fixtures or dropped on hard surfaces. Work slowly and deliberately. Rushing increases accidents exponentially.
Using abrasive cleaners ruins crystal clarity permanently. Once etched, the surface can’t be restored to its original brilliance. Always verify your cleaning product is crystal-safe before applying it to any part of your chandelier.
Troubleshooting common issues:
- Loose crystals after installation: Remove and inspect the fastener. The jump ring may not be fully closed or the pin might be bent. Replace damaged hardware rather than trying to force a poor connection.
- Dim sparkle despite cleaning: Check if you used tap water that left mineral deposits. Re-clean with distilled water. Verify bulbs are the correct wattage and not covered in dust.
- Crystals won’t fit: Confirm you ordered the correct size. A 1-2mm difference matters. Don’t force oversized parts, they’ll stress the mounting point.
- Uneven appearance: Step back and view the chandelier from 10 feet away. Minor imperfections visible up close often disappear at normal viewing distance.
Retighten fasteners without over-torquing. Use just enough pressure to close jump rings completely. Excessive force bends hardware or cracks crystal mounting holes. Learn to avoid common chandelier repair mistakes through careful attention to these details.
If a crystal repeatedly falls despite proper installation, examine the mounting point on the chandelier. The metal loop may be worn or bent open. Replace damaged fixture hardware before reinstalling crystals. Otherwise, you’ll fight the same problem indefinitely.
Expected Results, Timelines, and Outcomes
Minor chandelier repairs take 4-6 hours for most homeowners. This includes assessment, removal, cleaning, replacement, and final polishing. Complex chandeliers with hundreds of crystals may require 8-10 hours across multiple sessions.
Using authentic Swarovski or lead crystal parts extends repair longevity by 30% compared to generic substitutes. Quality crystals maintain clarity and don’t yellow over time. They’re precision-cut to maximize light refraction, ensuring your chandelier sparkles as brilliantly as the day you bought it.
Ordering online with free shipping over $22 reduces your parts cost by 15% versus retail stores. Local shops mark up specialty items significantly and rarely stock the full range of sizes and styles. E-commerce selection and pricing advantages make home repair more economical.
| Part Type | Repair Time | Cost Range | Expected Longevity |
|---|---|---|---|
| Authentic Crystal | 4-6 hours | $50-150 | 15-20 years |
| Generic Glass | 3-5 hours | $30-80 | 5-10 years |
| Professional Service | 1-2 days | $200-500 | 15-20 years |
Complete a final inspection before restoring power. Tug each crystal gently to verify secure mounting. Check that no tools or hardware pieces remain on the chandelier. Wipe down all surfaces one last time to remove fingerprints.
Turn on power at the breaker and test the chandelier. The restored brilliance should be immediately apparent. Properly installed authentic crystals create the signature sparkle that makes crystal chandeliers so desirable. Stand back and admire your work from multiple angles.
Maintain your repair with quarterly dusting using a microfiber cloth. Address any loose crystals immediately rather than waiting for them to fall. This proactive approach prevents cascade failures where one falling crystal damages others. Explore premium crystal prisms benefits to understand how quality materials preserve beauty long-term.
Realistic expectations matter. Your repaired chandelier will look professional if you followed proper techniques. It won’t look perfect if the fixture itself is aged or if you mixed crystal types. Accept minor imperfections as character rather than flaws. The goal is restored beauty and safety, not museum-quality perfection.
Enhance Your Chandelier Repairs with Crystal Place

You’ve learned the complete repair process. Now source the authentic parts that make the difference between adequate and exceptional results. Crystal Place offers premium Swarovski and lead crystal replacements that match your chandelier’s original specifications perfectly.
Enjoy free shipping on orders over $22, reducing your total repair investment. Browse an extensive selection of crystal prisms, replacement parts, and professional cleaning solutions. Every product meets rigorous quality standards to ensure lasting brilliance. Access expert guides and responsive customer support to confidently complete your restoration project. Visit Crystal Place to find genuine chandelier parts and premium crystal prisms that transform your space. Get professional chandelier repair tips from specialists with over three decades of experience.
Frequently Asked Questions about Crystal Chandelier Repair
What tools are essential for crystal chandelier repair?
You need needle-nose pliers, microfiber cloths, screwdrivers, crystal-safe cleaning solution, and a voltage tester. A stable ladder rated for your weight plus tools is critical for safe overhead work. These basics handle 95% of residential chandelier repairs.
How important is electrical disconnection before repair?
Disconnecting power at the circuit breaker is absolutely critical and non-negotiable. Not doing so causes 90% of repair-related electrical injuries. Always verify power is off with a voltage tester before touching any fixture components or wiring.
Can I use any cleaning agent on crystal chandeliers?
No, household glass cleaners contain ammonia and other chemicals that permanently etch crystal surfaces. Only use solutions specifically formulated for crystal. Mix them with distilled water to prevent mineral deposits and water stains that dull the finish.
How long does a typical minor chandelier repair take?
Most homeowners complete minor repairs in 4-6 hours including assessment, removal, cleaning, installation, and polishing. Complex chandeliers with extensive damage may require 8-10 hours across multiple work sessions. Quality work can’t be rushed.
Where can I buy authentic replacement crystal parts?
Crystal Place specializes in genuine Swarovski and lead crystal replacement parts with free shipping over $22. Ordering from reputable suppliers ensures you receive precision-cut crystals that match your chandelier’s specifications and provide lasting brilliance.
Why do authentic crystals matter more than generic alternatives?
Authentic Swarovski and lead crystals extend repair longevity by 30% and maintain superior light refraction. Generic glass lacks optical precision, yellows over time, and dims under heat. The initial cost difference pays for itself through durability and sustained beauty.
Recommended
- Replace Chandelier Crystals: 65% Less Damage in 2026 – CrystalPlace
- Crystal Chandelier Maintenance 2026: 65% Retain Shine – CrystalPlace
- 7 Steps to a Complete Crystal Chandelier Checklist – CrystalPlace
- How to Repair Chandelier Crystals for Flawless Shine – CrystalPlace