

Learn how to upgrade any light fixture with crystals in one afternoon. Step-by-step DIY guide covering tools, parts, installation, and maintenance tips.
Plain, outdated lighting is one of the fastest ways to make a beautifully decorated room feel flat. A single crystal fixture can flip that entirely, scattering rainbows across walls and ceilings the moment the light turns on. The good news is that upgrading your existing fixture with crystals is far more manageable than most homeowners expect. You don’t need an electrician or a contractor. With the right parts, a few basic tools, and a clear process, you can transform any room’s lighting from forgettable to genuinely stunning in a single afternoon.
Key Takeaways
| Point | Details |
|---|---|
| Enhanced room brilliance | Crystal upgrades make lighting sparkle and add elegance to any décor. |
| DIY-friendly process | Most homeowners can install crystal upgrades in an afternoon with simple tools. |
| Customize your style | Choose from a variety of shapes and crystal types for truly unique results. |
| Long-term value | Crystal fixtures are durable, timeless, and can be refreshed easily as styles change. |
Why upgrade to a crystal light fixture?
Crystal fixtures do something that no painted shade or fabric cover can replicate: they bend and scatter light in ways that make the entire room feel alive. When light passes through a real crystal prism, it splits into its full spectrum, creating that signature sparkle and warmth that defines elegant interiors. This isn’t just a visual trick. It’s physics working in your favor, and the results are dramatic.
The brilliance of crystal lighting is measurable. Crystal fixtures increase brilliance by up to 30% compared to standard fixtures, which means your existing bulbs work harder for you without any additional energy cost. That’s a meaningful return on a relatively simple DIY investment.
Beyond the light quality, crystal fixtures carry a design versatility that few materials can match. They work beautifully in traditional dining rooms, but they’re equally at home in modern minimalist spaces where a single crystal pendant becomes a sculptural focal point. The key is choosing the right crystal style and shape for your room’s existing aesthetic.
Here’s what makes crystal fixtures worth the upgrade:
- Instant visual impact in any room, from entryways to bedrooms
- Timeless appeal that doesn’t go out of style the way trendy fixtures do
- Light multiplication that makes spaces feel larger and more open
- Compatibility with both warm and cool bulb temperatures
- Customizability since you can mix shapes, sizes, and crystal types
“The right crystal fixture doesn’t just illuminate a room. It becomes the room’s most interesting feature.”
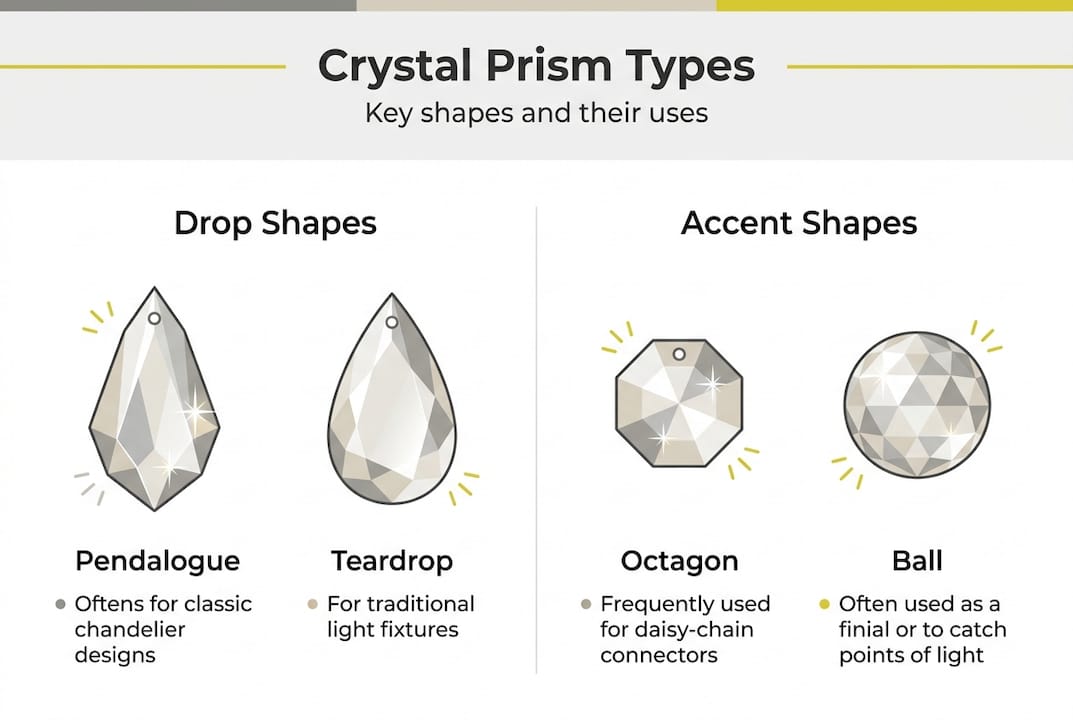
Understanding the different types of crystal prisms available is also important before you shop. Pendalogue drops, octagons, and teardrop shapes each create distinct light patterns, so your choice directly affects the final visual effect. Once you’re inspired by what a crystal fixture can do, knowing what you need is the natural next step.
Gathering parts and tools: What you’ll need
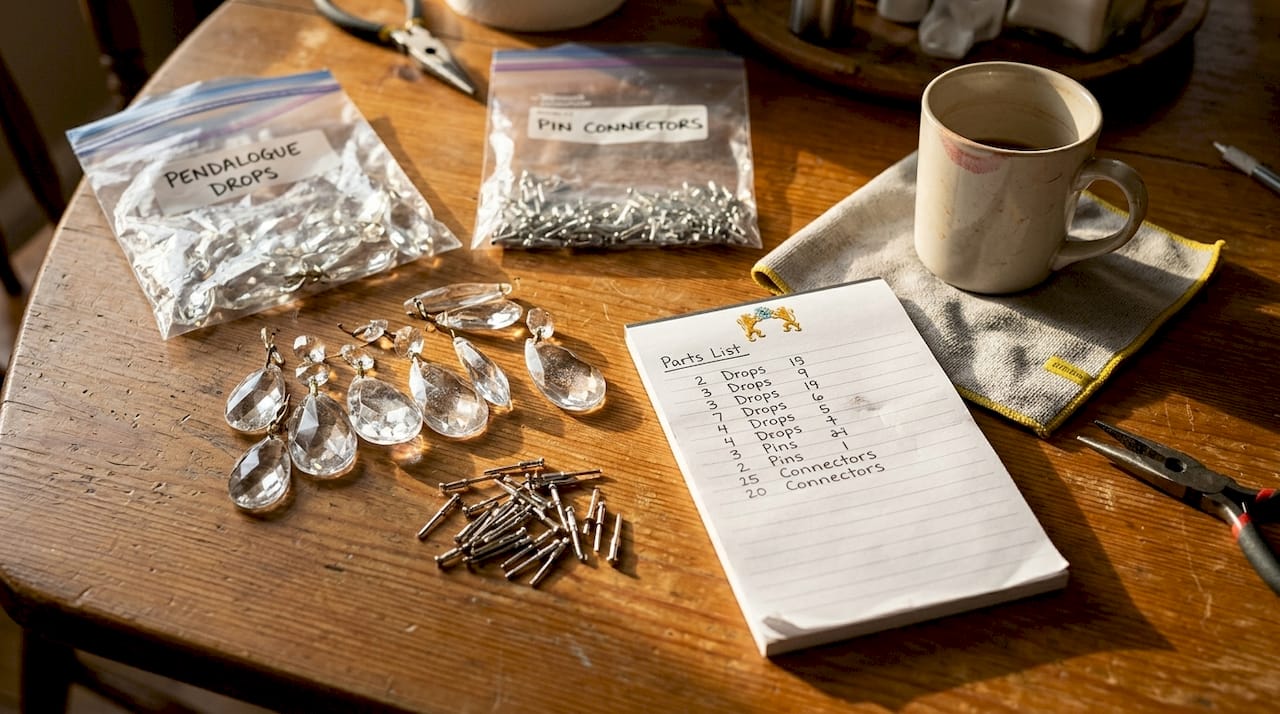
A successful DIY upgrade starts with preparation. Showing up halfway through a project to realize you’re missing a specific pin or connector is frustrating and avoidable. Spend 20 minutes gathering everything before you start, and the actual installation will feel smooth.
Basic tools you’ll need:
- Flathead and Phillips screwdrivers
- Needle-nose pliers
- Safety gloves (crystal edges can be sharp)
- A stable step ladder
- A soft cloth or microfiber towel
- A small container for screws and pins
For the crystal components themselves, the options are wider than most people expect. The replacement chandelier parts guide covers everything from bobeches (the decorative rings that hold crystal drops) to connector pins and arm sleeves, so you can identify exactly what your fixture needs before ordering.
Here’s a quick reference for common crystal parts and their typical use:
| Part | Function | Common shapes |
|---|---|---|
| Crystal drops | Primary decorative element | Teardrop, pendalogue, almond |
| Bobeches | Holds drops in place | Round, scalloped |
| Connector pins | Links crystals to fixture | Straight, eye pins |
| Strands | Creates curtain effect | Beaded chains |
| Finials | Decorative cap pieces | Cone, ball, spear |
Quality matters more than most beginners realize. Cheap acrylic pieces look fine in photos but lose their sparkle quickly and scratch easily. Real crystal, especially pieces from trusted brands, holds its clarity for decades. Check out replacement crystals overview to understand what to look for when comparing materials.
Pro Tip: Order 10 to 15% more crystals than you think you need. Small pieces get dropped, and having extras on hand means you won’t have to pause mid-project waiting for a reorder.
With everything ready, you’re equipped to get started. Let’s walk through the upgrade process step by step.
Step-by-step: Upgrading your fixture with crystals
This is where the transformation actually happens. Follow these steps carefully, and you’ll end up with a fixture that looks professionally installed.
-
Turn off the power. Go to your breaker box and cut power to the room entirely. Don’t rely on the wall switch alone. Confirm the light is off, then wait two minutes before touching anything.
-
Remove the fixture if needed. For full upgrades, it’s easier to work on the fixture at a table rather than overhead. Have a helper hold it while you disconnect the wiring, and label each wire with a small piece of tape before disconnecting.
-
Disassemble existing parts. Remove any old crystals, shades, or decorative elements. Set aside anything you plan to reuse. This is also the time to inspect the frame for any rust, cracks, or loose joints.
-
Clean every surface. Wipe down the fixture frame with a damp microfiber cloth. Dust and grease on the metal will show once the crystals are reflecting light, so don’t skip this step.
-
Attach your crystal drops. Start from the bottom of the fixture and work upward. Use needle-nose pliers to open and close connector pins securely. The crystal replacement process is a reliable reference for matching drop placement to your fixture’s design.
-
Check alignment as you go. Step back every few minutes to look at the overall balance. Uneven crystal placement is the most common finishing mistake.
-
Reassemble and rewire. Reconnect wires according to your labels, secure the fixture back in place, and restore power at the breaker.
“Working methodically from bottom to top keeps the weight distribution even and prevents you from having to redo sections.”
If your fixture has multiple arms, check out guidance on replacement arm parts to make sure each arm’s hardware is compatible before you start attaching crystals.
Pro Tip: Use a small zip-lock bag for each arm’s hardware. Label each bag so you never mix up which pins or drops belong where.
With the upgrade complete, the final touches and troubleshooting ensure the transformation is both beautiful and safe.
Troubleshooting and finishing touches
Even a careful installation can produce a few small issues. Knowing how to spot and fix them quickly is what separates a good result from a great one.
Common problems and their fixes:
- Uneven drop lengths: Measure from the fixture frame to the tip of each drop. Adjust connector pins to standardize the length.
- Cloudy or streaky crystals: This usually means residue from handling. Wipe each piece with a lint-free cloth lightly dampened with white vinegar and water.
- Loose fittings: Re-crimp connector pins with pliers. A pin that isn’t fully closed will eventually let a crystal fall.
- Mismatched crystal shapes: This is why choosing the right shape matters from the start. The best crystal prisms guide helps you select shapes that work together visually.
Here’s a quick comparison of finishing approaches:
| Issue | Quick fix | Long-term solution |
|---|---|---|
| Dull sparkle | Wipe with vinegar solution | Use higher-lead crystal drops |
| Uneven hang | Adjust pin length | Measure before installing |
| Missing pieces | Replace individual drops | Order extras upfront |
| Color mismatch | Swap to clear crystal | Plan color scheme before buying |
For ongoing brilliance, keep a few maintenance habits in mind. Dust your fixture monthly with a soft brush or duster. Do a full wipe-down with a crystal-safe cleaner every three to six months. Avoid ammonia-based cleaners, which can dull the surface of real crystal over time.
Pro Tip: A small LED spotlight aimed at your crystal fixture from a 45-degree angle will dramatically increase the rainbow scatter effect across your walls, especially in rooms with white or light-colored ceilings.
Learning to work with premium crystal prisms also opens up creative possibilities for how you arrange and layer different shapes within a single fixture. Reflecting on your successful upgrade, consider how to maintain your fixture and experiment with future DIY projects.
Maintaining and customizing your upgraded fixture
A crystal fixture is an investment, and like any investment, it rewards consistent care. The good news is that maintenance is simple once you build it into a routine.
Ongoing care checklist:
- Dust lightly every two to four weeks using a soft, dry brush
- Deep clean with a crystal-safe solution every three to six months
- Inspect connector pins annually for signs of corrosion or loosening
- Replace any cracked or chipped drops immediately, since damaged crystal scatters light unevenly
- Check that the fixture’s mounting hardware remains tight, especially after any vibration from nearby construction or heavy foot traffic
One of the most underrated benefits of a DIY crystal fixture is how easy it is to customize seasonally. Swapping out a few drops for colored crystal accents in deep red or emerald green takes less than 30 minutes and gives your space a completely different feel for the holidays. Clear teardrop drops can go back in just as quickly afterward.
Knowing when to replace parts rather than just clean them is also important. Revitalizing your chandelier with fresh crystals every few years keeps the fixture looking new without requiring a full replacement. Crystal that has been handled frequently or exposed to cooking fumes can develop a permanent haze that no cleaner will fix.
Well-maintained crystal fixtures retain their sparkle significantly longer than fixtures that go without regular care, making routine upkeep one of the highest-return habits a homeowner can build. Use the finding crystal parts resource to quickly locate compatible replacements when you spot a piece that needs swapping out.
Now that you know how to upgrade, maintain, and enhance a crystal light fixture, here’s why our DIY approach stands out.
Our perspective: The real beauty of DIY crystal upgrades
Most people underestimate what they’re capable of until they finish their first crystal upgrade and stand back to look at the result. There’s a specific kind of satisfaction in knowing that the stunning fixture above your dining table is something you built and installed yourself. That feeling doesn’t fade.
What we’ve seen over decades of working with homeowners is that crystal upgrades are almost always the project that builds confidence for everything that follows. Someone who was nervous about touching a fixture becomes the person who redesigns their entire entryway lighting six months later.
The other thing worth saying plainly: crystal is more forgiving than it looks. A small asymmetry in drop placement disappears once the light is on and the room is filled with reflected sparkle. Perfection isn’t the goal. A fixture that brings genuine beauty and character to your home is. Transforming your space with crystals is less about technical skill and more about patience and attention to detail, two things any homeowner can bring to the table.
Upgrade your lighting with premium crystals from CrystalPlace
Ready to bring that crystal brilliance into your home? At Crystal Place, we’ve been helping homeowners and decorators source authentic, high-quality crystal parts since 1991.
Our store carries a wide selection of premium crystal parts including prisms, drops, bobeches, connector pins, and complete chandelier kits, everything you need to start or finish your upgrade with confidence. If you’re looking for something a little different, our crystal ornaments and sun catchers are a beautiful way to add crystal sparkle to windows, shelves, and smaller fixtures. We offer free shipping on orders over $22 within the USA, so getting started costs less than you’d expect.
Frequently asked questions
Can I add crystals to any type of light fixture?
Most light fixtures can be upgraded with crystals if they have exposed arms or structural elements for attaching drops or prisms. The chandelier parts guide helps you identify what attachment options your specific fixture supports.
What types of crystals work best for lighting upgrades?
Clear, high-lead content crystals offer the most brilliance, but colored and shaped options can add creative flair to any room. Different prism types create unique light effects depending on their cut and shape.
How do I clean my crystal light fixture after upgrading?
Wipe crystals with a lint-free cloth and a mild cleaner, and avoid harsh chemicals that can dull the surface. Let all parts air dry fully before reassembling to prevent water spots. Ongoing maintenance tips keep your fixture looking its best between deep cleans.
Do I need to turn off power before working on a fixture?
Yes, always turn off power at the breaker before any electrical or fixture work. The fixture safety steps outline exactly how to do this safely before you touch any wiring.
Where can I find replacement crystals that match my fixture?
Online crystal specialists carry a wide range of shapes and sizes, and matching guides make it easy to find compatible parts. The replacement crystals guide helps you identify the right drop style and connector type for your existing fixture.
Recommended
- How to replace chandelier parts: a 2026 DIY guide – CrystalPlace
- How to Install Chandelier Crystals for Stunning Results – CrystalPlace
- Why upgrade chandelier crystals for brilliance in 2026 – CrystalPlace
- Replace Chandelier Crystals: 65% Less Damage in 2026 – CrystalPlace
- Architectural lighting guide for UK homeowners: design tips